Rehab Coach is strongest when you treat it like an investor scoping assistant, not a magic quote button. The better your inputs, the more useful the scope, cost bands, coach notes, and before/after renders become.
This guide explains how to use the tool, what each input changes, and how to read the output without over-trusting anything the photos cannot prove.
Summary
Start with the address, review the photos Rehab Coach finds, select the images that best show condition, choose the budget tier that matches your strategy, and use the custom instructions to steer the plan. The output is a first-pass rehab scope for deal screening and contractor conversations, not a substitute for bids, inspections, or final construction drawings.
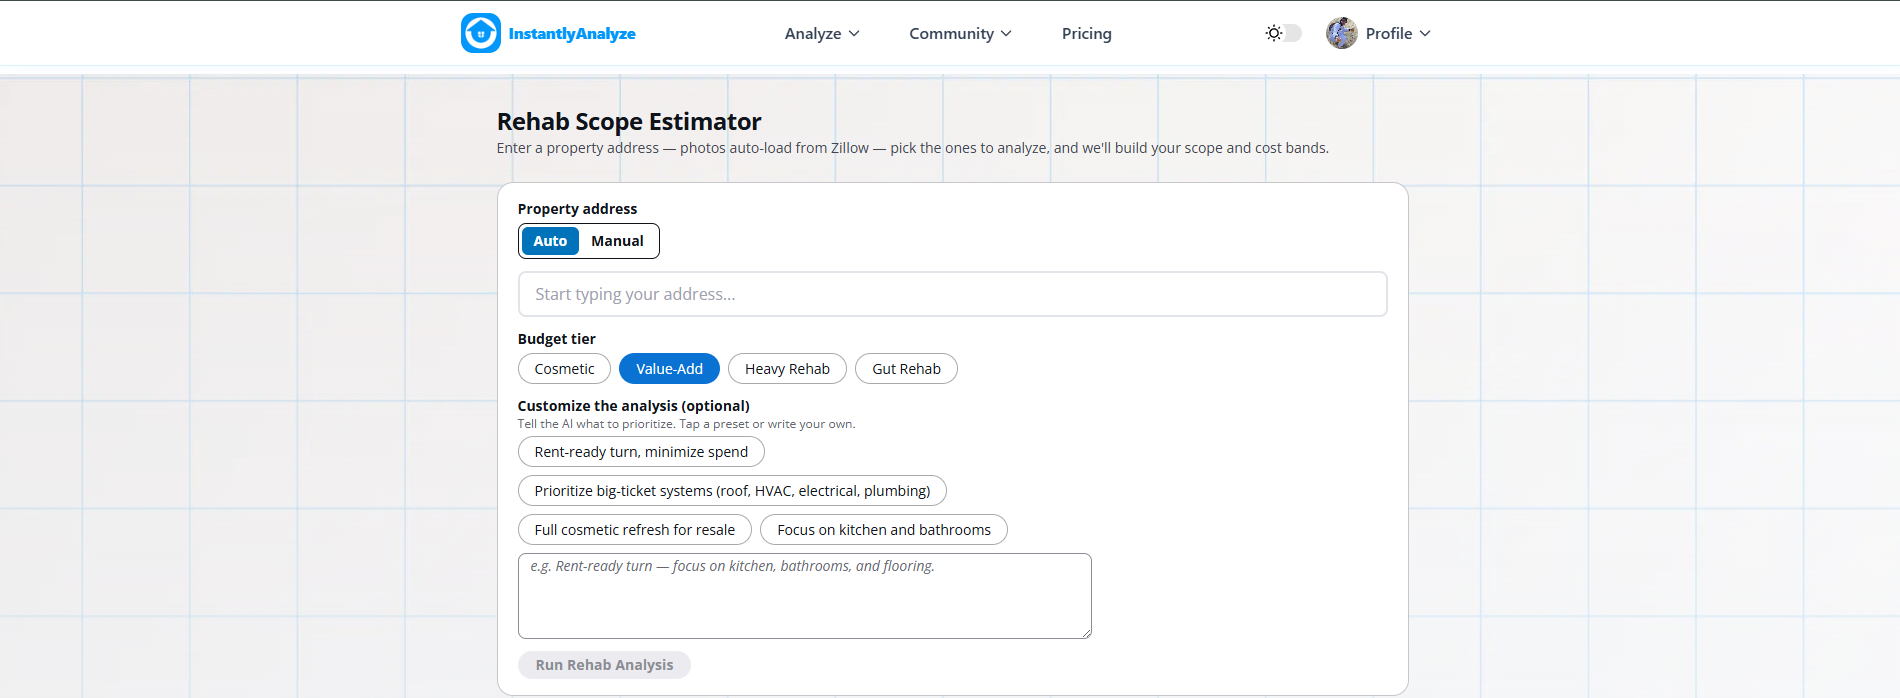
1. Start With the Address
Enter the property address first. When listing photos are available, Rehab Coach pulls them into the workflow so you can scope a deal before scheduling a walkthrough.
The address also helps populate property details such as beds, baths, square footage, and year built when that data is available. Those details matter because the tool can use them to recommend items that may not be fully visible in the photos.
If the fetched facts look wrong, use the edit details control before running the analysis.
2. Choose Photos That Explain the Property
Photo selection is one of the most important inputs.
Choose photos that show:
- Exterior condition and curb appeal
- Kitchen condition
- Bathrooms
- Flooring across multiple rooms
- Ceilings and walls
- Water stains, peeling paint, damaged finishes, or visible hazards
- Mechanical or basement areas when available
Do not only select the prettiest listing photos. Rehab Coach needs evidence of problems. If the kitchen looks good but every ceiling is stained, include the ceiling photos. If the exterior has peeling paint and window damage, include the exterior shot.
On Time Saver, photo selection is intentionally limited. Pick the highest-signal images. Fully Automated can analyze more photos, which is better for large listings or properties where the damage varies room by room.
3. Use Uploads When Listing Photos Are Weak
Listing photos often skip the exact issues investors care about. They may hide basements, utilities, roof edges, windows, water damage, old panels, or awkward room conditions.
If you have your own walkthrough photos, upload them. Extra photos are especially useful when:
- The listing only shows staged or flattering rooms.
- You want the scope to reflect damage not visible online.
- A contractor, agent, or property manager sent you better photos.
- You need the before/after render to use a specific viewpoint.
Better photos do not guarantee a perfect estimate, but they reduce the amount of inference the tool has to make.
4. Pick the Right Budget Tier
The budget tier steers the finish level and scope posture.
| Tier | Best for | How to think about it |
|---|---|---|
| Cosmetic | Light turns | Paint, fixtures, landscaping, small visible improvements |
| Value-Add | Most investor rehabs | Kitchen, bath, flooring, curb appeal, and durable rent-ready work |
| Heavy Rehab | Major systems or full-room overhauls | Larger projects where condition problems are obvious |
| Gut Rehab | Down-to-studs projects | Total renovation planning, not a light rental turn |
For most rental investors, start with Value-Add. Use Cosmetic for a clean property that needs a light turn. Use Heavy Rehab or Gut Rehab only when the condition clearly warrants it.
5. Use Presets to Set the Strategy
The presets are quick ways to tell Rehab Coach what kind of plan you want:
- Rent-ready turn, minimize spend: best for long-term rental investors who want habitability and durability without over-improving.
- Prioritize big-ticket systems: useful when you are worried about roof, HVAC, electrical, plumbing, or safety issues.
- Full cosmetic refresh for resale: better for flip-style plans where buyer appeal matters more.
- Focus on kitchen and bathrooms: useful when the property is mostly functional but dated in the rooms that drive rent or resale appeal.
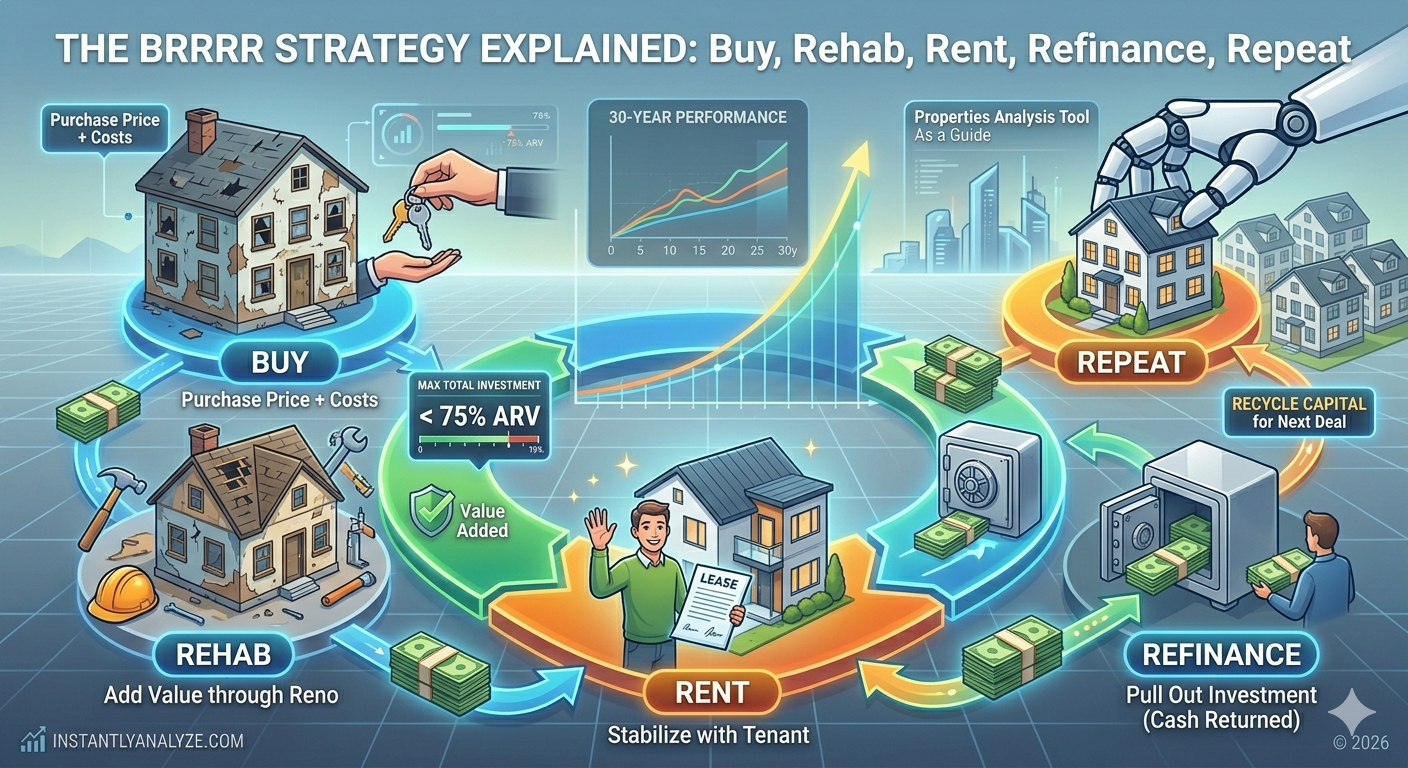
If your goal is a BRRRR rental, be explicit. A good prompt is: "Rent-ready BRRRR scope. Prioritize safety, water damage, flooring, kitchen, bathrooms, and durable finishes. Avoid luxury upgrades."
6. Write Custom Instructions Like an Investor
Custom instructions should describe the decision you are trying to make.
Good examples:
- "Budget rental turn. Make it clean, safe, and durable, but do not over-improve."
- "Heavy water damage risk. Prioritize roof, mold, drywall, and flooring before cosmetic items."
- "Resale refresh. Prioritize curb appeal, kitchen, bathrooms, and neutral finishes."
- "Contractor walkthrough prep. Call out what needs verification before bidding."
Weak examples:
- "Make it nice."
- "Modernize everything."
- "Give me the best renovation."
The more vague the instruction, the more generic the scope will be.
Free to use. No credit card needed. See cash flow, cap rate, and ROI in minutes.
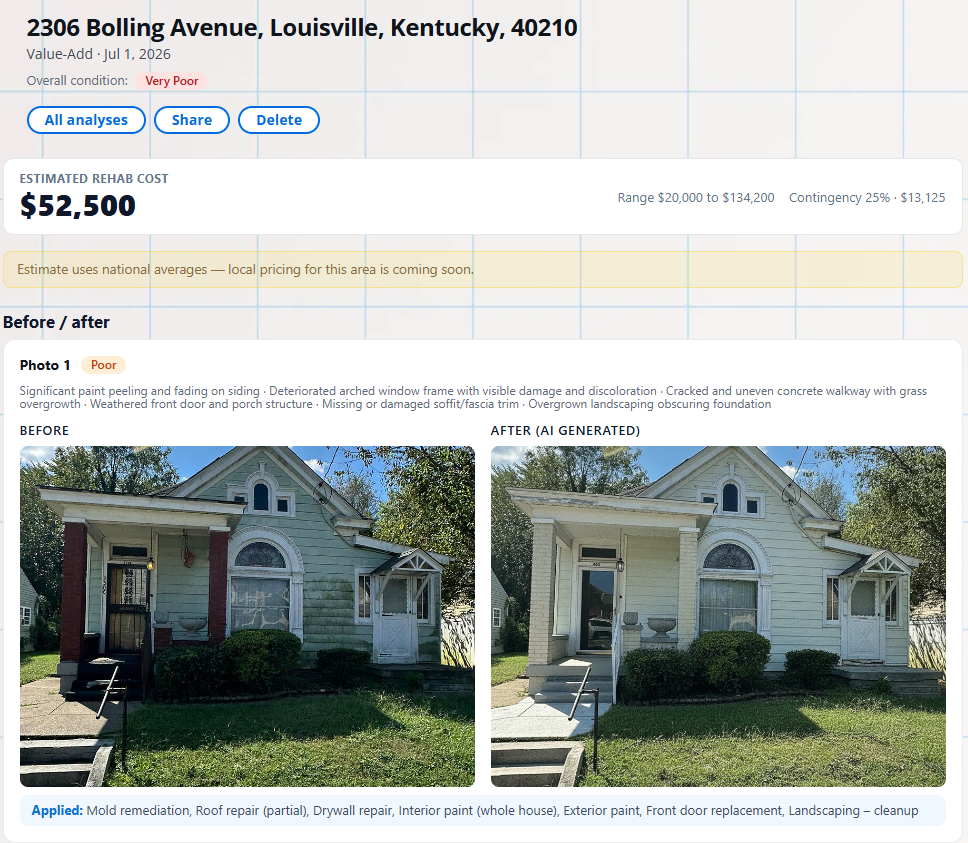
Start Analyzing — Free7. Read the Cost Bands Correctly
Rehab Coach shows Low, Mid, and High cost bands because rehab pricing is never one exact number at the screening stage.
Use the bands this way:
- Low: optimistic case or lighter finish level
- Mid: the main underwriting number for first-pass screening
- High: stress-test number for downside and negotiation
If the deal only works at the low number, it probably needs a lower offer price or stronger proof before you move forward.
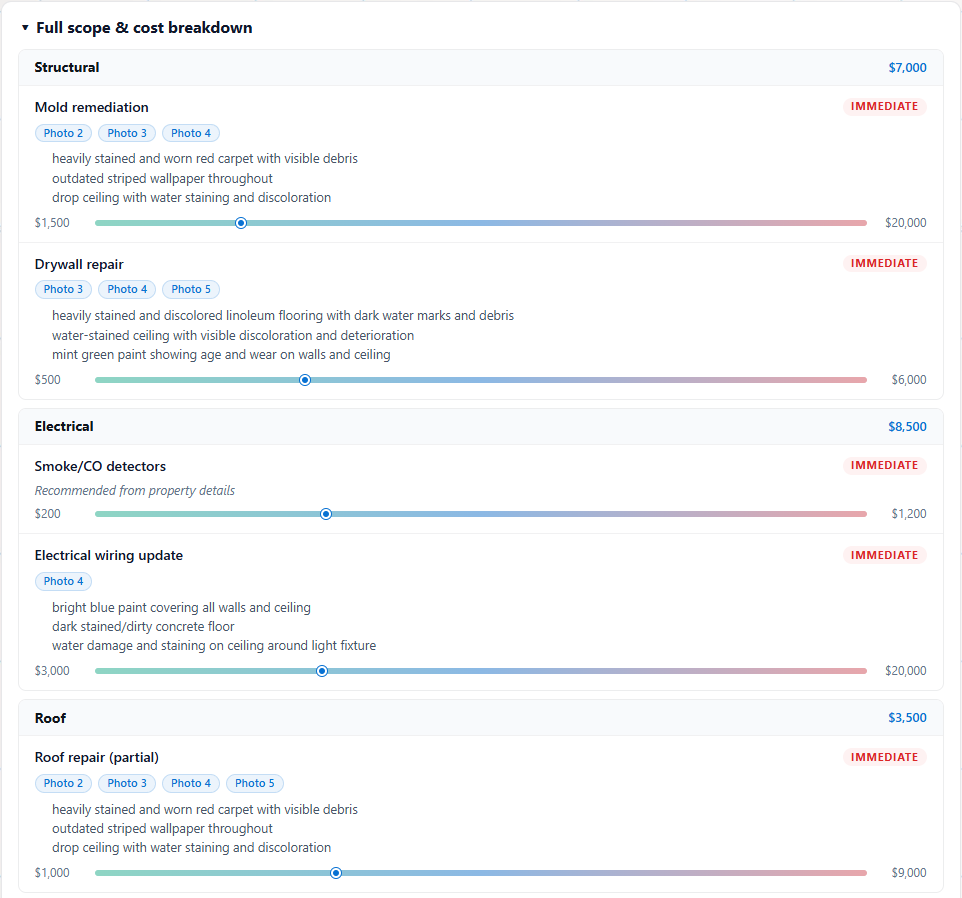
8. Check Evidence Before Trusting a Line Item
Each line item should make sense against the visible evidence.
Look for:
- Which photo triggered the item
- Which visible issues were detected
- Whether the priority feels right
- Whether the item is immediate, recommended, or deferred
- Whether any major condition risk is missing because the photos do not show it

If a line item looks too aggressive, rerun with clearer instructions. If a line item looks too light, add better photos or tell the AI what you are worried about.
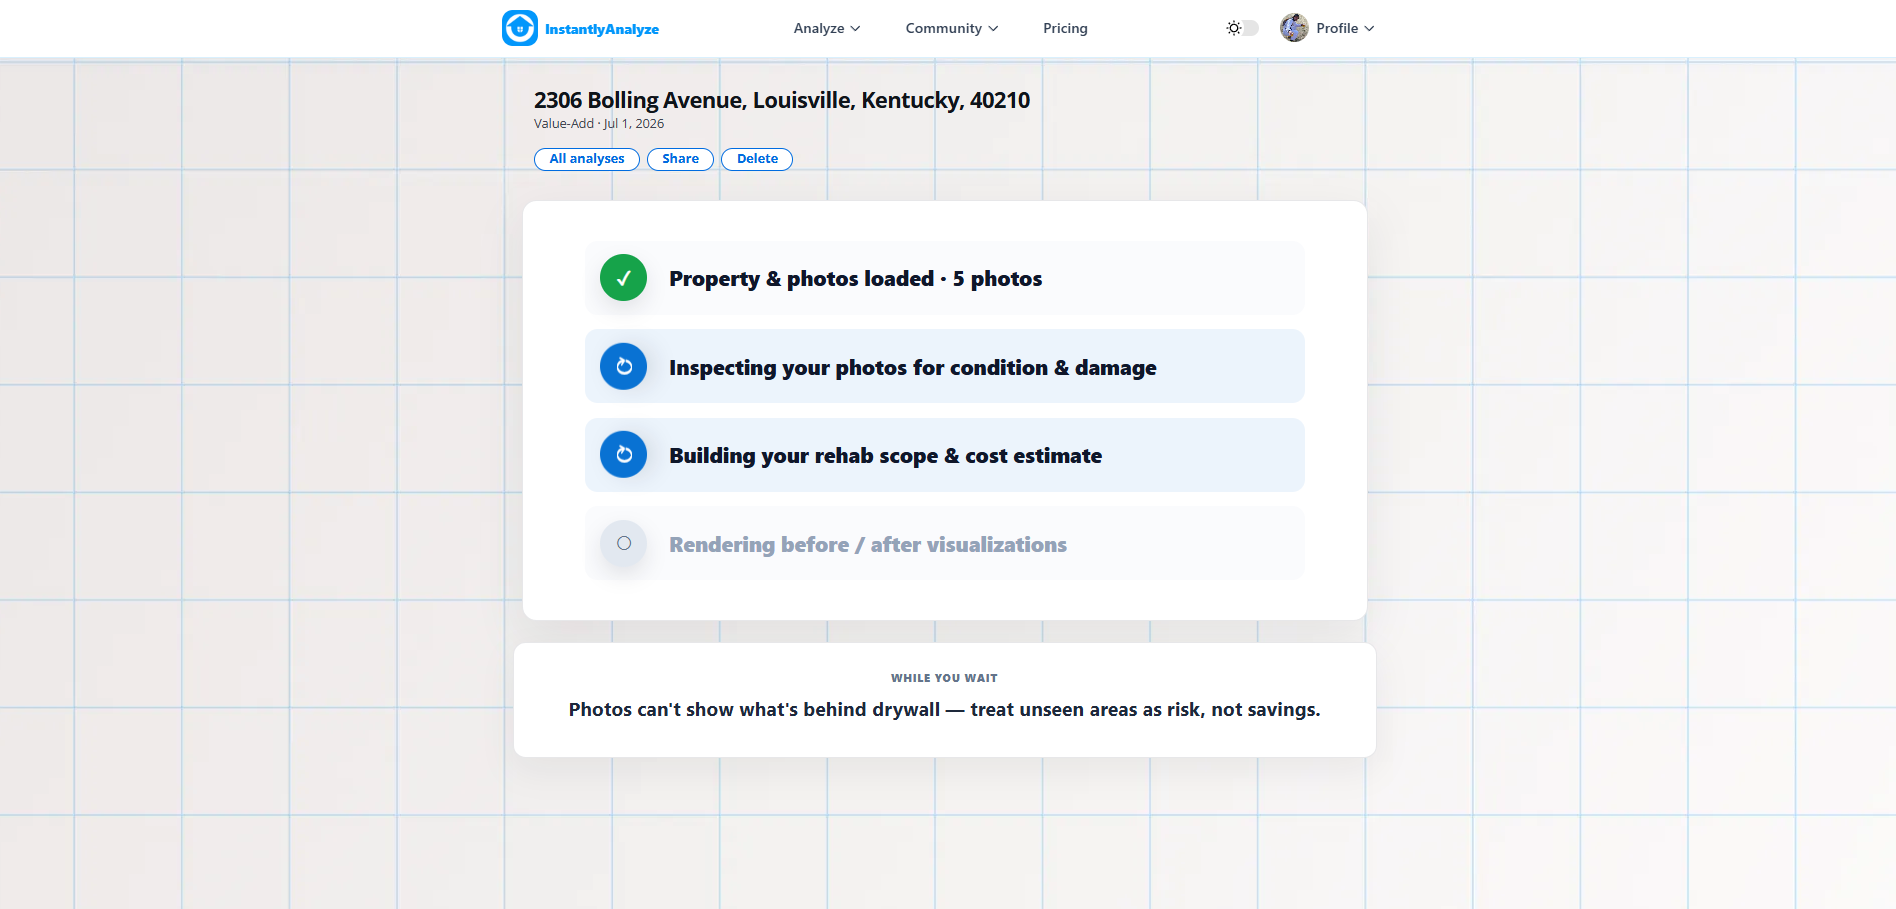
9. Use Coach Notes for Sequence
Coach notes explain what to do first and what to watch out for.
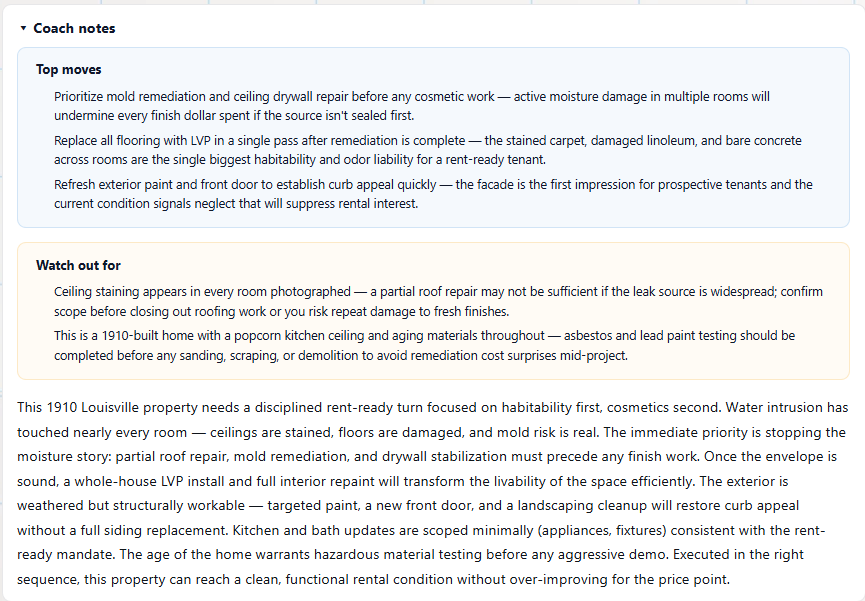
This is especially useful when the property has layered problems. For example, water intrusion and mold risk should be handled before flooring and paint. A scope that gets the sequence wrong can make the budget look cleaner than the project really is.
10. Respect the "What We Could Not See" Section
The hidden-risk section is not filler. It is the reminder that photos cannot inspect everything.
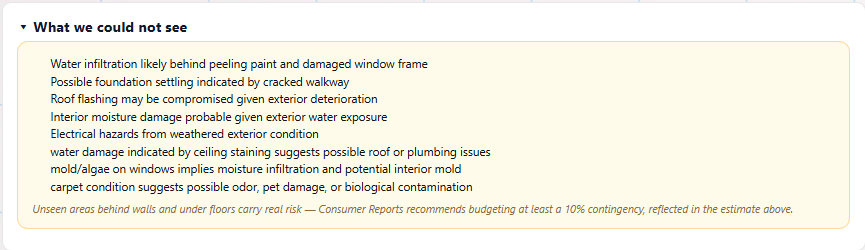
Use this section to build your next-step checklist:
- What should the contractor inspect?
- What should the home inspector pay attention to?
- What needs a contingency?
- What could change the offer price?
If the hidden risks are serious, do not treat the mid estimate as final.
11. Share the Scope Carefully
Rehab Coach can help you communicate the renovation vision, but think about audience.
For a partner or lender, you may want the cost bands, condition grade, and plan summary. For a contractor, you may want the visual scope and work priorities without exposing every underwriting assumption.
Sharing is an active development area. The goal is to make it easy to show contractors the vision and scope while keeping investor-only numbers and assumptions under your control.
Current Quirks to Know
The product is available now, but the workflow is evolving quickly. Screenshots in this guide reflect the July 2026 version.
A few practical notes:
- Listing photos are only as good as what the listing exposes.
- Before/after renders are planning visuals, not construction documents.
- Cost bands are for screening and negotiation, not final bids.
- The tool works better when your instructions are specific.
- If the result feels off, rerun with better photos or a clearer strategy.
Upcoming improvements are focused on stronger rehab plan creativity, better renovation concepts, and cleaner sharing workflows for contractors and collaborators.
Bottom Line
Use Rehab Coach to turn rough property photos into a faster rehab plan: select high-signal photos, choose the right budget tier, write investor-specific instructions, and read the cost bands with the hidden risks in mind.
Then use the output for what it is best at: deciding whether the deal deserves deeper diligence.